Thursday 31 December 2015

2015: A Year in Review

I thought I'd have a look back at the year and what I have made, since it is New Year's Eve and all...

Clothes
I set myself a challenge to make a garment a month for the year. It petered out towards the end, but I still have lots of yardage and grand plans for it in 2016. For the full round up have a look here.


Row 1: Roly Poly; Bess Top, Wiksten Tank, Ella Top
Row 2: Sutton Blouse, Alder skirt, Bianca Top, Sailor Top
Row 3: Two sweet Christmas Geranium tops


Aussie Birthday Club
The 2015 half of the AHBC - I got spoilt rotten on my birthday and I made some lovely things too (if I say so myself). Although I feel a bit sorry for the 2014 cohort since I know how much my sewing has improved over the last 12 months. Sorry guys! I always did the very best I could though

Clockwise from top left: Embroidery to go bag; Noodlehead envelope clutch; Dolly; AMH mini, Curvy Clutch


Swaps
I participated in a lot of swaps. I find it hard not to join in, but next year I am going to try and sit them out since I have some long term larger WIPs I want to finish. Although, I do find that I push myself to try new and harder things for swaps. 

Clockwise from top left: My Sierpinski Mini, Aussie Christmas Swap, Rocky the Tula Pink Squirrel, Sapphire Mini, Schnitzel & Boo Mini Swap


Quilts
Although I only finished these, I do have an obscene amount of WIPs to burn through next year - check back once the new year has ticked over to see my list.

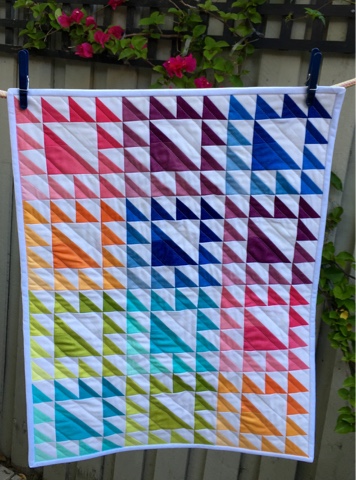
Clockwise from top Left: ABC quilt, Sea Star Quilt, Scrappy Union Jack, Fruit Tingle


Pillows

Clockwise from Top Left: Wee wander pillow 1; Princess Twilight Sparkle; Wee wander pillow 2; Briar Rose pillow


Fete Sewing
Lastly, Moo's school had a fete and I had a stall, so I sewed my backside off prepping for that. That tied me up pretty much for the rest of the year.


And that is pretty much it - a productive year! 

Thanks for reading along with me and have a safe and happy New Year. Bring on 2016!

Sunday 27 December 2015

Aussie Christmas Swap: Rainbow Pillow

Finally, last minute Christmas sewing is over, fete sewing is over, work is over (for the year, let's not get too excited), school is over, so I have a spare few minutes to write a blog post.

I feel it is very appropriate to write this post this long weekend since it was a make for the Aussie Christmas Swap. 


My partner said they loved Tula, Alison Glass and EPP / hexagons. Well, I have a fair amount of both Tula and Alison in my stash but given the short timeframe for the swap plus all the associated Christmas / year end crazy there was no way I was going to have time for hand piecing. I went with a pattern that had a good geometric design still though and hoped that would meet the criteria for my partner. 

Pattern I drafted up in PowerPoint


First up I whipped up some foundation paper piecing templates in PowerPoint. I am a big believer in playing to your strengths and I am good at PowerPoint. Obviously not the quilters tool of choice but for something simple in a pinch I thought it was a good option. 

Then auditioning colour placement and piece, piece, piece. Once done I was a bit stumped with how to quilt it, so I sat on it (metaphorically, not literally) for a few days and is often the case, the solution came to me in bed. I used my growing collection of Aurifil to match the colours and quilt it up. 

In love with the quilting pattern

I couldn't decide which part I loved the most, so two quilting pictures!

I used some Alison Glass Ex Libris for the pillow back and bound it in bike path in black and called it finished. Truth be told I was sorry to send it off, but spirit of Christmas and all that. 


This is my December ALYoF finish

Stats
Quilt: Alison x Tula Rainbow (technically it's a pillow)
Pattern: inspired by a pillow made by Sami (@imasavonasac on Instagram)
Dimensions: 16" x 16"
Fabric: mainly Alison Glass Handcrafted (I & II) and assorted Tula Pink (Eden, Elizabeth, True Colors)
Binding: Alison Glass Bike Path in Black & White
Backing: Alison Glass Ex Libris in Bookplate warm
Quilting: Aurifil 50wt in assorted colours

Now. I know people say it is better to give than receive and I felt pretty good about my giving, but I totally hit the jackpot on the receiving end. My partner was Carmen (@wombatcupcaketree on Instagram) and it was like she read my mind. 

A truly thoughtful gift


The necklace was actually on my Christmas Wishlist for my family so I had to take that off. I feel so very fortunate to have received a gift that someone put so much thought into. Thank you Carmen!!

Thursday 10 December 2015

Sew Mama Sew Giveaway Day


** This giveaway is now closed. Congratulations to the winners Cindy Weaver & Mrs Quinn! Both have been contacted via email. Thanks again to everyone who entered and for all the book recommendations, I am sorted for Summer reading**

Hello!! This is my first Sew Mama Sew Giveaway Day (at least as a giver - I have entered lots of times though!).

I am very excited to be able to participate. 

If you are popping over from the giveaway, then here is a bit about me: my name is Hayley and I have been sewing for a bit over two years. I started sewing when I was pregnant with daughter number two. I have two girls affectionately known as Ms Moo and Ms Bird - hence the blog name - and a very tolerant husband who puts up with my sewing addiction and bits of thread all over the house. My first sewing love is quilting, but I also love to make bags, purses, pillows and more recently have been making some clothes. I live in beautiful Sydney, Australia. I have a ridiculous number of WIPs but 2016 is going to be all about finishing (some of) them off! Have a sticky beak around and if you like what you see I'd love for you to pop back from time to time and see what I have going on. 

But now to the main event!! Today I have these two pencil cases to give away. Since there are two pencil cases, I'll pick two winners.


The prize!


What's on the inside
What do you have to do to win? Just leave me a comment telling me whether you would prefer to win the low volume or black one - the first one I pick will get their choice first. And if you want to leave me a book recommendation for my Summer holidays, that would be nice too. That's it - no other hoops to jump through.

I'll pick the winner Sunday 13th of December and I'll ship internationally. Now get back over to the giveaways and get entering!

(I try to reply to comments, but I am anticipating lots for the giveaway so please don't be upset if I don't reply to you. Let me just say good luck here!)

Sunday 6 December 2015

December ALYoF Goal: Aussie Christmas Swap Gift

For those of you that follow me on Instagram (I'm @peaches1003) you will have seen the gift that I have been overgramming am making for the Aussie Christmas Swap.


I was inspired by a similar pattern by Sami (@iamsavonsac). I have been drooling over it for ages and was so glad to have a reason to try it.

My partner says she likes Tula Pink and Alison Glass - I hope she means it!! 

The posting date is the 8th of Dec so I have to be done by then.. 


Wednesday 25 November 2015

Now I know my ABC’s

 I finally have a quilty finish to share with you! A big one (relatively) – I seem to have spent all year making (or at least finishing) minis, bags, pillows, etc, with no big finishes.


I don’t know what initially gave me the idea of making this. I had seen all the individual letters made during the original Spell it with Fabric blog hop last year, but for some reason  about six months ago I started whipping up the individual letters in between making other things. Each letter is very quick to make and doesn’t use too much fabric. As a plus, there are minimal HSTs (there may not be any actually) which makes me a happy quilter.


Anyway, I decided that this would be the perfect teacher gift for Moo’s Kindergarten teacher. How fitting to give an alphabet quilt to the person teaching my girl to read? I think in general teachers are underpaid and underappreciated and Kindergarten has to be a tough gig, right? I love my kids more than anything in the world and some days I need to go outside and take a deep breath – imagine doing that with 30+ that aren’t even your own....


I needed to add four blocks to square out the quilt and I decided to use these cute little books from Ayumi Mills’ Patchwork Please! I love the blocks, but they were a little smaller than I needed and the day I made them I reallystruggled to figure out how to size them up. I just could not get my brain around it. I did manage to get blocks the right size eventually, after much swearing, but they are not centred, which is not that noticeable when they are not sewn into the quilt, but it became very apparent once the top was all pieced together because now the quilt is not symmetrical. And that bugs me. A lot. (You should see the fun we have at our house when we hang pictures).


I backed the quilt in some of the famous Ikea Britten print (Tempe Ikea has loads of it people). I bought 6 metres of it. As a bonus, it was just wide enough that I didn’t have to piece the back. Yay! Gotta love avoiding a pieced back for a quick finish. 


I quilted it up stitching down the sashing and around the letters in white Aurifil. If I have one regret about this quilt, it is that I tried to stitch in the ditch around the letters. It just looks....not bad, but I know it could have been better. I should have unpicked it and started again after the first one, but for some insane reason I persevered and I don’t think it is my best work. I would have been better off echoing the letters. But never mind. I’ll know better next time. Not having quilted anything bigger than a baby quilt for a while, I found quilting this really hard. Turning the corners on the letters made some weird things happen if I wasn’t careful – something happened to the tension and the thread got caught in the machine and pulled at the bottom and broke. The quilting was also made much more difficult by the batting. I used Quilters Dream that I bought off Massdrop and I won’t be buying that again. It was so fluffy and my threads that need to be buried have huge fuzz balls attached.


I bound it with a rainbow jelly roll that I picked up ages ago, so now it is done!


That is a finish off my Q4 FAL goals and my November ALYoF finish (and I might add, a huge weight off my mind). 


(Ms Moo was my photographer - I think she did a great job)


So here are the stats: 


Quilt Name: Now I Know my ABCs

Size: 55.5” x 62.5”

Pattern: Spell it With Fabric from Moda

Fabric: Scrappy (nearly) all from my stash

Binding: Scrappy Rainbow Solids

Backing: Ikea Britten Fabric

Quilted: With white Aurifil by me


__


Sunday 15 November 2015

Sunday Stash: November 15

Welcome to my first Sunday Stash!

Here are my goodies! 


Padding out my stash for my month as queen bee in The Beehive Quilts. I think I have landed on my block choice - I just need to whip up a sample or two. 


The Cotton +Steel is for The Intrepid Thread Challenge I am participating in. Check back in January for my blog post about that one. The Alison Glass is for my Aussie Christmas Swap - we won't mention that I said no more swaps. 


Lastly the reindeer are for a Christmas dress for Ms Bird and the Bonnie & Camille is to finish off my Marmalade pillow. And you can never have too much white thread, right?

Looks like a lot but it was on sale, so I figure I was saving money...

Linking up to Molli Sparkles Sunday Stash

Tuesday 3 November 2015

November Goal ALYoF

My goal for November is to finish my alphabet quilt that I am making using the pattern that was released as part of the Spell it With Fabric blog hop hosted by Moda last year.


This quilt is to be an end of year / Christmas gift for Miss Moo’s Kindergarten teacher, so time is running out and I have to get it done.


Good news: the top is pieced, I have batting and I bought six metres of Ikea’s Britten fabric so I am well and truly sorted for backing. I just need to baste it (ugh) and quilt / bind it. My plan is for pretty straight forward quilting – along the seam lines between each block and then echoing the letters to make them pop. That’s the plan at least.


Linking up to the November ALYoF goal setting party. Wish me luck!

Monday 26 October 2015

Blogger's Quilt Festival: Fruit Tingle

When I first saw the post that the Blogger’s Quilt Festival was approaching again, I was very disappointed as I didn’t think I would have anything to submit and I had so much fun last time round. (If that's where you've popped over from, Hi!! Have a look around).

But then I remembered that in my attempt to get some WIPs out of the pile I had set myself the challenge of finishing my Sweet Tooth Mini from the Fresh Mini Quilt Club as my ALYoF Goal for October. How fortuitous! I am entering this quilt in the small quilt category. Go and check out all the fabulous creations for some quilty eye candy.

I signed up to the FMQC back in 2013 when I had just started quilting. I thought it would be a fun way to get some quick makes done. After all, a mini should be pretty quick to finish. Out of the six months in the subscription I finished two and started one more – the Sweet Tooth.  Let me introduce to you my version: I am calling it the Fruit Tingle (not sure if you can get these lollies everywhere, but Aussies should get the reference – something about this mini just reminded me of them).

A finish!


When I started making this mini, I grabbed myself a junior jelly roll of V&Co ombre fabrics (the old ones, not the new ones) and got chopping. I really wanted the graduation within each block of light to dark. The only challenge that I had was that I didn’t have any of the same fabric in pieces big enough for the centre, so I just got my problem solving hat on and pieced them together. I made all of my HSTs and got trimming.

Colour graduation


In order to break up the tedium (each block has 12 x 2” HSTs) I trimmed enough for a block and then pieced it, trim, piece, trim, piece. I have blogged before about my love / hate relationship with the HST and these teeny tiny ones just were too much for me. Defeated I whacked the completed blocks and pieces into a sandwich bag and there they languished until now.

My photo assistant. Does not take direction well....check that belly button


A few things have changed since November 2013 (!!) when I started making this mini: 1) I have loads more sewing paraphernalia and there is no room for unfinished WIPs (watch this space – I am going to be finishing / retiring a whole stack of WIPs in the new year); 2) I bought a Bloc Loc (world changed is all I can say there); and 3) I am just a much better at sewing than I was two years ago. It is embarrassing that finishing off the blocks and piecing / quilting / binding only took perhaps two evenings and I can’t think why I put it off for so long. 

For those of you who have seen this pattern before, the original configuration was a 4 x 4. There was also some grey fabric in the jelly roll, but in order to make all 16 blocks I needed 4 grey ones and I didn’t have enough fabric so I pieced the centres with the little leftover bits for a rainbow pop. When it came time to piecing it all together though, I just didn’t like it, so I just made my mini a bit more....mini.

My helper insisted on a photo for Olaf


Unlike most things I make I am keeping this for myself. I don’t have a wall where I can hang my mini’s at the moment, but I am hoping for a new sewing space one day and it will be nice to have something me made on the wall.

I really love this mini and am so please to have it finished. Here are the stats:
Name: Fruit Tingle Mini
Pattern: Sweet Tooth by Megan Bohr at Canoe Ridge Creations, part of the Fresh Mini Quilt Club
Dimensions: 18” x 24”
Fabric: V&Co Ombre
Quilting: Straight line in Aurifil white

Thursday 22 October 2015

WIP Wednesday: A Spotty Swoon

I kind of feel like a Swoon Quilt is a rite of passage for a quilter. The internet is certainly awash with them and I myself have a Pinterest board dedicated just to the Swoon.


I started mine a long time ago. This was going to be a quilt for my bed! I signed up for one of Camille Roskelley’s Craftsy classes and the pattern came with the class. Now, do you think I have done that class? Have I even finished my Swoon? Do I have a quilt for my own bed? No, no and no. I just looked back in Instagram and I posted my first block 63 weeks ago!!! And I am sure that I cut the fabric a long time before that, so this quilt has been hanging around in my garage sewing room for a long time. 


Since this was going to be for my bed, which is also my husband’s bed, I didn’t want it to be too girly. I bought myself a FQ bundle of Dear Stella’s mini confetti dots, armed myself with some yardage of Kona Silver and off I went. Chop, chop, chop. 


Now first of all, can I say that there is not a lot of wriggle room in the cutting instructions if you are cutting from FQs. Keep in mind that I started making this when I hadn’t been sewing for very long, so I was not the accurate cutting star I am now. Some of my FQs were also....let’s just say cut on a bit of an angle.  Whatever, I made do with what I and cut all my blocks where they languished for a while, unsewn, but neatly organised in sandwich bags (as an aside, I didn’t discover sandwich bags til I had kids and they are a life changer – get some if you haven’t already!).


When I finally came to make my first block I realised a few things: 1) they are huge; 2) you need to make a lot of HSTs – not my favourite; 3) the squares for the HSTs are sized so you “shouldn’t” have to trim them once you are done (note that this assumes you can sew in a straight line; 63 weeks ago I had not mastered that skills, some of my seams have a creative seam allowance); 4) each block takes a while to make, especially if you are not so good at sewing in straight lines. Hence why my quilt is still unfinished. 


To be fair, I didn’t watch the Craftsy class on the Swoon so I am sure that there are some great tips in there that would have accelerated my progress and made my sewing more accurate. I do use the tips that were in the first episode regularly, so this is not a reflection on the instruction but more my general impatience and my general attitude that with rough guidelines are enough and I can figure the rest out. Not necessarily the most efficient. Also, now that I am up to block number 7, I am MUCH faster and 63 weeks later I am a much better sewer. So much so that there is finally light at the end of the tunnel.


I have two more blocks to make and then I need to quilt the beast. The idea of that sends a shiver down my spine. The biggest thing I have quilted on my machine is a king single (not sure what that translates to outside of Australia) so not that big. I am seriously contemplating QAYG for this, unless someone points out a good reason why this wouldn’t work.  


This is on my Q4 FAL list and realistically I don’t know if I will get it done for December but I will definitely push for that. I also need to add point number 5) to my list above. The blocks look fantastic and I know I am going to love this quilt when it is done and be super proud of having achieved my Swoon Quilters Badge*


(* Not a real thing, but probably should be)


Linking up to WIP Wednesday.

Sunday 18 October 2015

Sewing for others

There is something so lovely about being able to make something for someone else. I guess that's why I still don't have a quilt of my own, right?

Still it is very satisfying to be able to do something I love for someone I love.

Last weekend I was invited to a kitchen tea for a friend and colleague. I had a gift but at the last minute I decided to whip up an apron to go with it. Since I was making it the night before I had to go with what I had on hand (most of my fabric is in FQ or smaller pieces), but I managed to dig out two prints that I think worked quite well. It only took an hour to whip up, so all in all very satisfying.

Ta da! Makes you just want to bake, doesn't it?

And the other side


The other thing I whipped up recently was a Curvy Clutch. My Mum's best friend's Mum is turning 90 and Mum asked if I could make one for her. This lady is so amazing. When I had my girls she knitted up a lovely little cardigan for them, so of course I said yes. (I would have said yes anyway even if she was a dragon because my Mum asked me and you do stuff when your Mum asks you).

I love, love, love this print! And I love the piping as well. Sigh. Tula is just so clever

I have made two of these before, but when I made them first time round I used Vilene 640 as the interfacing. Since I made them I have discovered that you can get Shapeflex at Spotlight and so this time I used that. Talk about a difference. When patterns have called for Shapeflex in the past, having never seen it I never really knew what I was comparing against. I found that it did give a lot more structure than the Vilene and was also a lot less bulky. That said, with the double layer of interfacing on the exterior, plus the double layer of the accent piece, plus piping there were some pretty chunky parts to sew through. Even though I switched to a 100/16 needle I still ended up breaking it. First it just bent and then jammed and I couldn't get the presser foot up (queue panic) and then it snapped. I pulled the whole of my machine apart looking for the tip of that bloody needle. I even cleaned it while I was at it. Only to find it jammed in the actual bag. Needle(ss) to say I was a bit nervous to finish it off. I found this useful little thing in my sewing machine accessories though and that helped the chunky parts through the machine.

Know your accessories! 

The clutch is a finish off my Q4 FAL list. A productive quarter so far! I plan on finishing the year on a high.


Friday 16 October 2015

A Lizzy House / Tula Pink Patchwork Pillow

My dear little nephew turns six today.

In years gone by I have made his sisters birthday gifts, but this year it's his turn. My sister (his Mum) is a very clever crocheter and was making him a blanket for his bed, so I whipped him up this patchwork pillow.

A match made in heaven - two of my favourite designers

His new blanket is all blues, yellows and reds, so hopefully this will go nicely.

I'll be honest, I find little boys a bit of a mystery. I struggle with his gift every year more than any other. I mean, would a full of beans little boy think "woo hoo" to receive a quilt? With this pillow I started my fabric selection with the red dinosaurs. I mean, find me a six year old who doesn't like dinosaurs. And I know my nephew does. Then I just pulled fabrics that I knew would go with the decor in his room. The other challenge I faced is that a lot of my fabric I would say is a little on the girly side.

I bound it in the matching Constellations print from Natural history and backed it with some blue gingham that was in my stash.

For this pillow I did an envelope back. It was my first time because I didn't have a zipper the right size and even though I followed a tutorial I found online I had an issue with gaping in the back. I usually get a cushion insert that will make the pillow nice and plump. Even after cutting open the insert and removing some of the stuffing I still had a horrible gape. I ended up stitching it up by hand - having bound the pillow top, I didn't really want to undo it all to remake the back. It's a bit of a pain, because it means that if it needs to be washed it will need to be undone and sewn back up, but on the plus side I stitched it up with red embroidery floss and I think it looks really cute. Plus the red floss echoes the red I used for the quilting on the front.

Not the closure I envisioned, but it sure looks cute

His party is on the weekend so hopefully his gift is well received. This is a finish off my Q4 FAL list.

Sunday 11 October 2015

Q4 FAL Goal Setting

My disbelief as to where the year has gone continues. Here is my list for the last hurrah of 2015!

A Garment a Month list


Quilts
1. Swoon - I just want this done
2. My Spell it with Fabric quilt

Just the quilting to go
3. My Genny & Ruth Quilt


Other
1. A 241 tote. I'm going to use that lovely Alison Glass Art Theory fabric. 
2. A curvy clutch for my mum's bestie's mum's 90th
3. My Marmalade granny square pillow
4. My Birds and Bees economy block pillow
5. A pillow case for my own little wild thing (my nephew Max)

This is going to be a lovely big pillow


There's so much more I want to make - I am trying to keep Q4 realistic, but I think next year I am going to list out all of my UFOs and just get them done. 

Linking up for the Q4 FAL party

Tuesday 6 October 2015

October ALYoF Goal Setting: Sweet Tooth

I was going to pick something else for my A Lovely Year of Finishes goal this month, but then I thought of all of those half completed projects in my sewing room (hangs head) and thought perhaps I should try and finish one of those off instead...

Some time ago I signed up for the Fresh Mini Quilt Club with Megan from Canoe Ridge Creations (I'm talking Round 2 here, it is up to Round 5). Anyway, I was half way through making the Sweet Tooth pattern when I threw a narnie at trimming all of those HSTs and buried it in my sewing room somewhere. Now, I own a Bloc Loc and I am determined to finish it off.


I think it is going to be quite special - I made it using a jelly roll of V&Co's ombre fabric (not the new ones). I rmember really loving it. Apart from the HSTs. A billion of them. Teeny ones.

Linking up to the ALYoF October Goal Setting Party

Monday 28 September 2015

A Garment a Month: September - Sailor Top

My project this month was the Sailor Top by Fancy Tiger Crafts.

I was keen to try something that had sleeves (raglan, but still) and I had done a little bit of gathering with the Geranium top I made the month before, so I thought "Sure, I can handle that".


What I thought of the finished garment: Love it. It looks like I got it at a shop (but a really cool and individual shop ;) ). This is probably my favourite out of all of the garments I have made so far. It is really flattering and a good length for me - no riding up and exposing my belly as I am running around and hauling kids back and forth.


An aside, I finally got a new phone, so hopefully the quality of my photos should improve!

What I thought of the pattern: The pattern was easy to understand and clearly set out, yet I found the construction more complicated than I thought it would be. I found the neckline especially troublesome. I tried sewing it down by machine but I missed a lot of the edges (you sew it from the front) and it looked quite shite. So I went and unpicked it and sewed the inside down by hand. Worth it for the nice neat finish, but it meant that I couldn't wear it to work the day I wanted. Some of the seam finishing instructions are a little unclear too I thought - especially when attaching the sleeves. I misread the pattern where is said "finish seams"- I literally thought it meant finish sewing the seams. I had to go back at a later stage and do some tricky zig zagging of the edges. Also, zig zagging is not my favourite finish, give me a good french seam any day.


Other observations:

  • Sewing with lawn is trickier than sewing with quilting weight cotton. I found it hard to get it to behave, but it was worth if for a lovely floaty top;
  • Making the pattern markings with a frixion pen is a bad idea. What do they always say to do when you are sewing? Iron, iron, iron! (actually press, I know it's different). What happens to frixion pen when you do that? Poof! No more markings. No markings actually made doing the gathering and attaching the yoke quite tricky. 
  • There must be an easier way to turn a hem up by an even amount. I currently mark it with a ruler to press along. Am I missing some really obvious trick? Help me people!
  • Not related to the pattern - but relevant anyway, all this garment sewing is starting to pay off. I am finding it more straight forward to follow patterns and every time I approach a pattern or technique with some trepidation I find that it is nowhere as hard as I had imagined. 

Next Challenge: Mmm, I am still debating it. I am tossing up between the Flatter Me Frock, The Emery Dress and The Anywhere Skirt. The first two because I think that they will be a challenge and I love a frock (I am thinking in Loominous or some of this sweet jumbo gingham) and the skirt because I can't get Anna's version out of my head. Have a vote! 

This is a finish for both ALYoF and my Q3 FAL.

Wednesday 9 September 2015

A garment a month - Geranium Top

My garment for the month of August was the Geranium top (pattern by Made by Rae)


Now, I know that this isn’t a garment for me, but it is still a garment and I did learn some new things so I am still counting it as a win.


Last month we had book week here, so the girls for school had to dress up as book characters. In the past it has always been dress up as any character from a book, but this year Ms Moo had to dress as a character from the particular book they were reading in class: A House of Her Own, which is a lovely little story, but I’ll be honest – doesn’t have a lot of scope for variety in costumes. The main character is a little girl called Audrey who wears a red spotty dress, green shorts and a big hat.


In the tradition of all parents, everywhere, I started making the costume at 8pm the night before we needed it. I had been sure that I had red and white spotted material and green material in my stash. Yes, I did, but not enough to make anything...sigh. With some clever improvisation I managed to make a top with a red spotted yoke and a green skirt. My dear daughter was less impressed...Five year olds, they are so literal. But she came around to loving it by the end of the day.


So the pattern – it was easy to follow. I made the View A top with flutter sleeves and the View B skirt and it was all pretty straight forward. I managed to have the entire thing finished by 1AM from taping the pattern PDF together to sewing the last button on, which in my view is pretty quick. I did have some issues with the skirt being too big for the yoke and had to add some extra pleats, but I am pretty sure that was user error because it was pretty late by the time I got to that stage.


Making the flutter sleeves was a new experience for me. I am not sure how the edges will wear in the wash since they are just finished with a zig zag stitch, but the basting worked like a dream and I am keen to try the gathers on my Sailor top which is up next in my garment a month challenge. 


I also need to work out how to do button holes properly on my machine. They were a bit wonky. Nothing a bit of Fray Stoppa won’t fix though.


The low point of making the top was when I was zig zagging the edges of the sleeves, I was concentrating so hard on sewing around the curve that I actually sewed right through my finger. Do you know, I had always wondered how it was actually possible to do that? But it isn’t actually that hard as I found out. (STOP READING IF YOU ARE EASILY GROSSED OUT). The worst part was that the needle broke and was stuck in my finger and I had to pull it out. And making the sleeves is right at the start so I still had to push on. And I had to get a tetanus shot. On the plus side, the needle was so super sharp (titanium coated) that it pretty much resealed itself and healed up really fast. Swings and roundabouts.


Anyway, there are definitely more geranium dress / tops on my horizon for my littles. I am going to try all the ways. I have visions of Lizzy House unicorns on Christmas Frocks.


Tuesday 8 September 2015

September ALYOF goal - Sailor Top

This month for my ALYOF goal I am going to make a Sailor Top by Fancy Tiger Crafts (is it only me who calls this the Fancy Sailor Top? That is what I was calling it in my head right until I looked it up for this post).


Anyway, I have this lovely lawn I got from Spotlight - I had planned to make this last month, but life happened, so here we are now.


I have a similar style top that I bought from Country Road a million years ago (I wore it in our engagement photos) and it is very flattering and forgiving (i.e., it still fits after two babies) so I have high hopes. Check back in next month to see if it is divine or disaster! 


Linking up to the ALYoF September Goal Setting linky.

Tuesday 25 August 2015

August Finish: Miss Polly had a Dolly

July marked the end of this round of the Aussie handmade birthday club.

I had a lot of fun participating in this swap over the last 12 months. I've met some great ladies, and have seen, made and received some beautiful gifts.

All in all I'd call it a big success! A huge thanks to Tara for organising it, I know that these things can be a logistical nightmare sometimes.

So here is my very last make that went to the lovely Gina:

Hello!


Over the course of the last year, I have made bags, minis, more bags....and when I reached August I just wanted to make something different. But what?? After a bit of stalking through Gina's Instagram feed, I saw that she was joining in a doll swap and thought aha! I could make a dolly.


She's got spirit - check the twinkle in her eye


I set about hacking a pattern I had bought some time ago to make a mermaid for my niece (pre-Instagram, it was that long ago!). I kept the head and then just drafted up a body and away I went. I didn't have the mental energy / skill to draft up a set of doll clothes, so I just made the body of the doll be her dress. I snazzed it up with a sweet little four leaf clover applique "brooch".


She also got a stylish scarf (because it is winter!) and some sweet red shoes.

She clicked her heels three times and the magic of Australia Post took her to her new home


To finish the package off, I used my favourite crafty gift wrapping - a fat quarter with a ribbon!

I'll miss my little dolly, I might have to make one for my own sewing room (but I'll have to hide it from the kids!)

This is also my finish for August's ALYoF.